Using the Contextchart View
You already learned in "The Main Shortcut” chapter, that the "Contextchart” is the default view mode for topics in Zingoolarity.
It is basically a hierarchical view of "boxes within boxes”, which can be customized in a mixture of horizontal and vertical alignment.
Here is a very simple example:
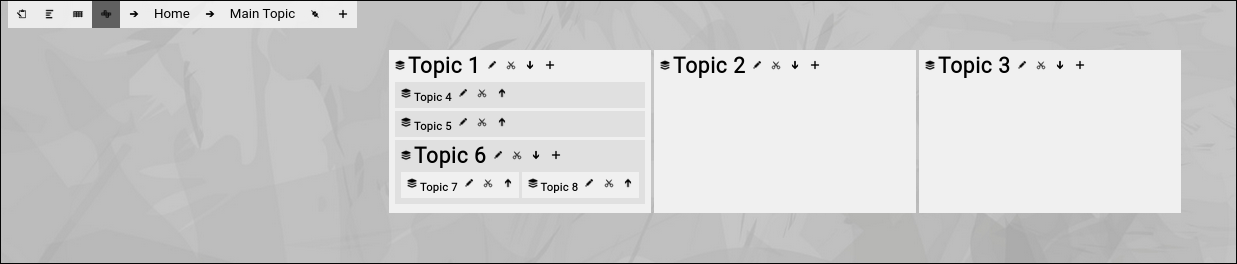
(Example of a contextchart view in Zingoolarity)
- We have focused on "Main Topic”.
- "Main Topic” contains 3 topics, which are horizontally aligned.
- "Topic 1” again contains 3 other topics, vertically aligned.
- "Topic 6” contains 2 topics, again horizontally aligned.
So what else do we see here?
On top you see the so-called "breadcrumb”:

(Example of the Zingoolarity breadcrumb)
The left part of the breadcrumb consists of four buttons.
The first button allows you to toggle between normal mode and presentation mode.
The other buttons allow you to switch between the different view modes:
- Roadmap view
- Kanbanboard view
- Contextmap view (currently selected)
The right part of the breadcrumb shows a hierarchy of topics, each topic consisting of a leading small arrow and the name of the topic.
Clicking on the name of the topic allows you to "focus” on the topic.
This is an easy way to "navigate up” in a hierarchy of topics (or to refresh the screen, if you click on the right-most topic, which is the topic currently in focus).
Clicking on the leading small arrow in front of a topic invokes the topic editor screen for this topic.
This allows you to quickly edit any topic in the hierarchy up to the "Home” topic.
At the end of the breadcrumb you will find the bookmark and the add buttons.
They will be explained later.
Below the breadcrumb, the real rendering as a "Contextmap” takes place.
All topics below the currently focused "Main Topic” are rendered as "boxes within boxes”:
(The "boxes within boxes” pattern of the Zingoolarity contextchart view mode)
Each topic has a small little "card stack" or "yellow sticky” icon next to it (depending on the iconset used).
This is the "signature icon” for a topic.
If the topic has a binary attachment uploaded, which is a picture (a file ending with .jpg, .png or .gif), the picture is rendered as an icon instead.
Next to the icon, the name of the topic is rendered.
The names of "closed” topics (which have a little arrow button pointing up next to them) are rendered in "normal size”.
The names of "open” topics (which have a little arrow button pointing down next to them) are rendered in bigger size (in our example above, this is "Topic 1” and "Topic 6”).
You can click on these "arrow buttons” to either open or close a topic.
Note that these buttons are only visible, if you have at least "write” level access to the topic.
This is because "open” and "close” is an attribute of the topic and the opened or closed state of a topic will be updated in the topic and visible to everybody else.
If you close for example the "Topic 6” in above example, the screen will look like this:

(Zingoolarity contextchart with a closed topic)
The topics inside of "Topic 6” are no longer rendered.
Instead, a small red number in brackets shows how many topics are directly below the currently closed topic.
And you will also note the already explained "rainbow bar”, which indicates the topic, on which you performed the last action (in this case, closing it).
Immediately next to the name of every topic, you will notice the "Edit” button.
This allows you to invoke the topic editor screen to make modifications on the topic.
And immediately after that, assuming that you have at least "write” access level to the topic in question, the "Cut” button (a little scissor) is visible.
If you click this button, the topic will be immediately cut to your own personal clipboard for later pasting it into a different location on the map.
If you have opened a topic, there is also an "Add" button to the right, assuming you have at least "write" access to the topic.
This allows you to not only insert a new topic below the currently focused one, but add it directly below a certain (opened) topic.
Clicking on the name of a topic on the map will focus on it (in the same way as already explained for the breadcrumb).
This is the equivalent of "navigate down” on the map and focus on the details.
If you do so on closed topics, the details become visible (even if the topic is still "closed”):

(Drill down into a Zingoolarity topic)
You can use the breadcrumb on top to navigate back (as already expained). |