Topics on the Map
Topics are rendered in the three different views nearly in the same way.
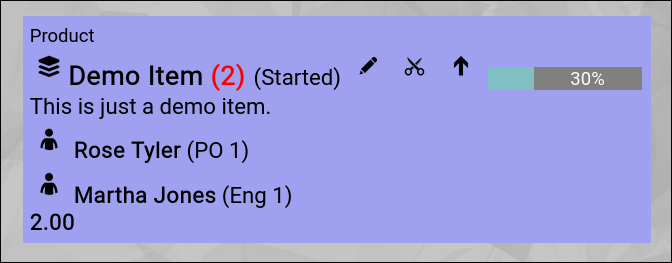
Here is an example with most of the possible information present:

(Example of a topic rendered on a map)
- In the upper-left corner, the type of the topic is shown (a "Product” in this example).
- Just below, the signature "stacked cards" or "yellow sticky” icon is shown (the default icon for a topic).
If the topic would have an image file as an attachment (=avatar), then the image would have been rendered instead.
- Just right of it, the name of the topic is shown.
- Right after the name, in brackets, the state of the topic is rendered.
Note the blue color of the topic box; this color is associated with the "started” state.
- Right after the state, the "Edit” button is visible.
It will invoke the topic editor screen to view more details or make changes on the individual topic.
- Right next to it, the "Cut” button is visible.
It will cut the topic to the personal clipboard for later pasting it somewhere else on the map.
This is only visible, if the user has at least "write" access to the topic.
- Right next to it, the "Open” or "Close” button is located (arrow down or arrow up).
It allows you to open or close the topic.
Closed topics optionally show the number of included topics inside in red.
Open topics render their content inside the topic box.
- Right next to it, the "percentage bar” can be seen.
It appears as soon as you set the estimated completion percentage of a topic.
- Just below, assuming you have activated the "Show Detail” option of the topic, the "Detail” is rendered as text.
In this view, the text is stripped of any HTML formatting to save space.
Adding a Team Member
As soon as you add persons to the team of the topic, they will also be rendered on the map, assuming that you have activated the "Team on Roadmap” option of the topic and the settings allow the rendering of teams in general:
(Example of a topic rendered on a map with an added team members)
Team members will be shown with the following attributes:
- Avatar
Either a default icon or an attached avatar image will be shown.
- Name
The name of the person in the team.
- Role and FTE
In brackets, the role of the person in the team and the allocated FTE will be rendered.
At the bottom of the team member list, the number of total FTEs will be added up.
Budget View
As soon as you enter a budget in the budget matrix of a topic, the budget matrix will be automatically shown in the topic box:
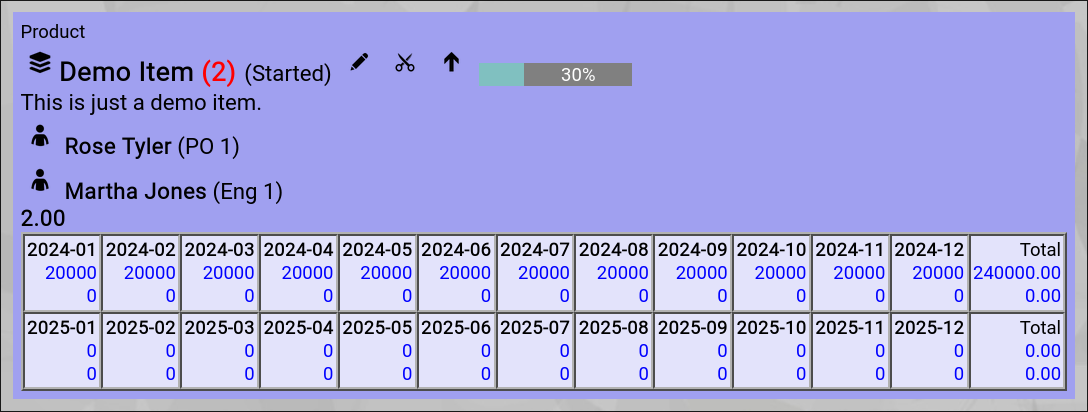
(Example of a topic rendered on a map with an added budget)
Automatic Totals
As soon as you have a team with FTE rendered, you will see total FTE information on every level of the topic hierarchy.
The same goes for budgets; as soon as one topic on the map has a budget, totals will be rendered on every relevant level.
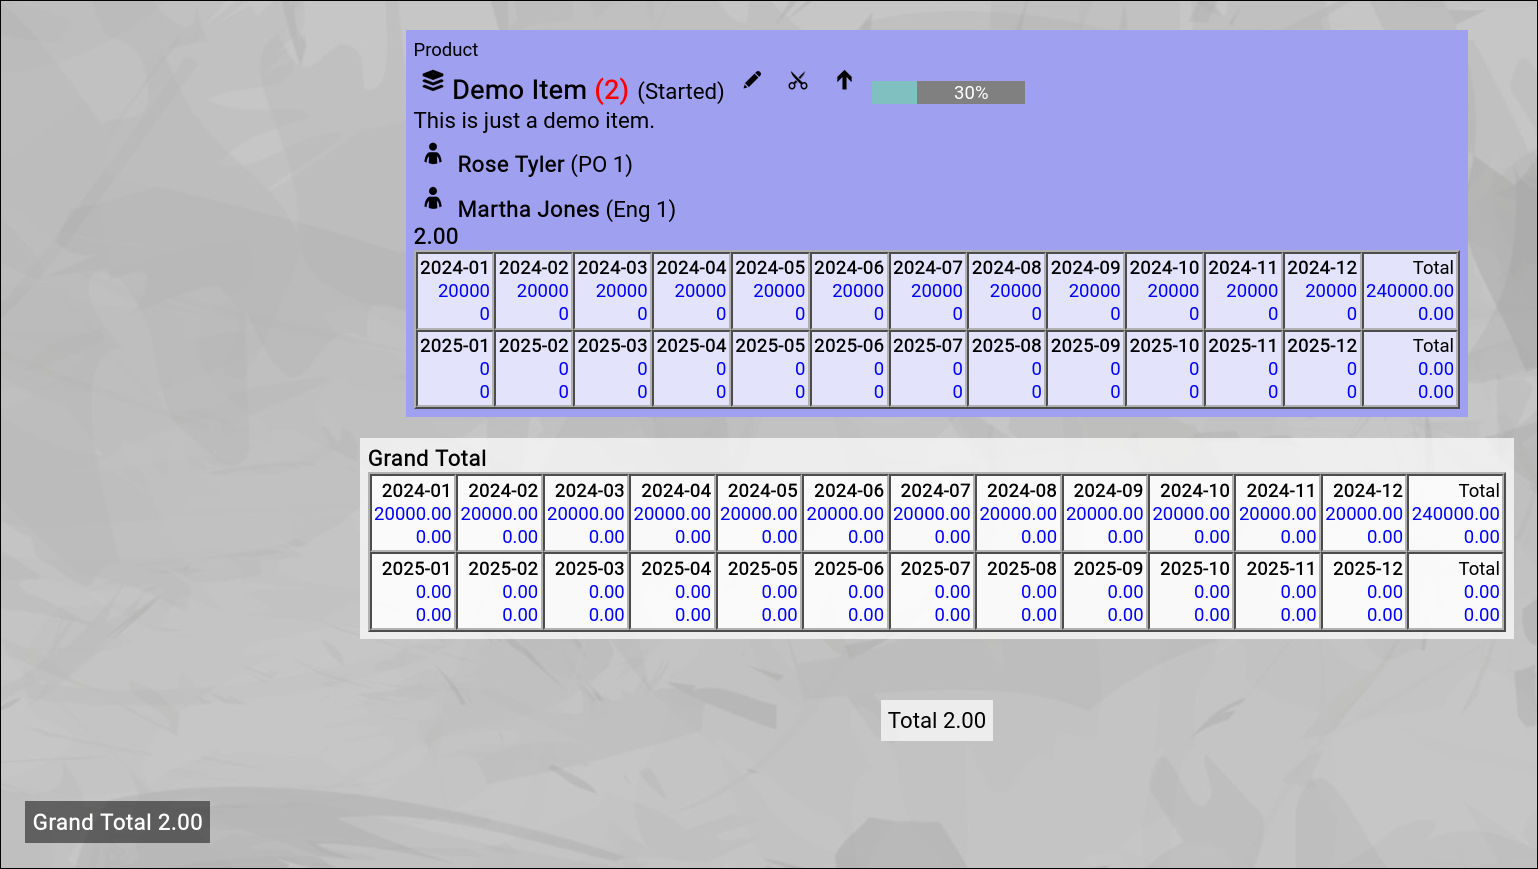
(Example of a topic rendered on a map with an added budget)
Link View
(to be added)
Capability View
(to be added)
Application View
(to be added)
Usage View
(to be added) |