Building Teams
Zingoolarity allows you to build teams around topics.
What exactly is meant by that depends mostly on what a topic represents:
- If a topic is for example a "project”, the team is essentially the project team.
- If a topic is for example a "product”, the team is essentially the product team.
- If a topic is for example a "unit” in the line organization, it can be a department with a department head.
- If a topic is for example an "epic”, your "team” might only consist of one responsible person who cares for the completion of the epic.
- ...
As all of this is dynamic (a topic can simply have a number of people associated with it), you can easily come up with other ideas.
The relationship of users with a topic forming a team has an additional number of important attributes, which will be explained further down.
You can switch to the team associated with a topic by clicking the "Team” button inside of the topic editor screen.
Initially the screen will be empty and will look something like this:
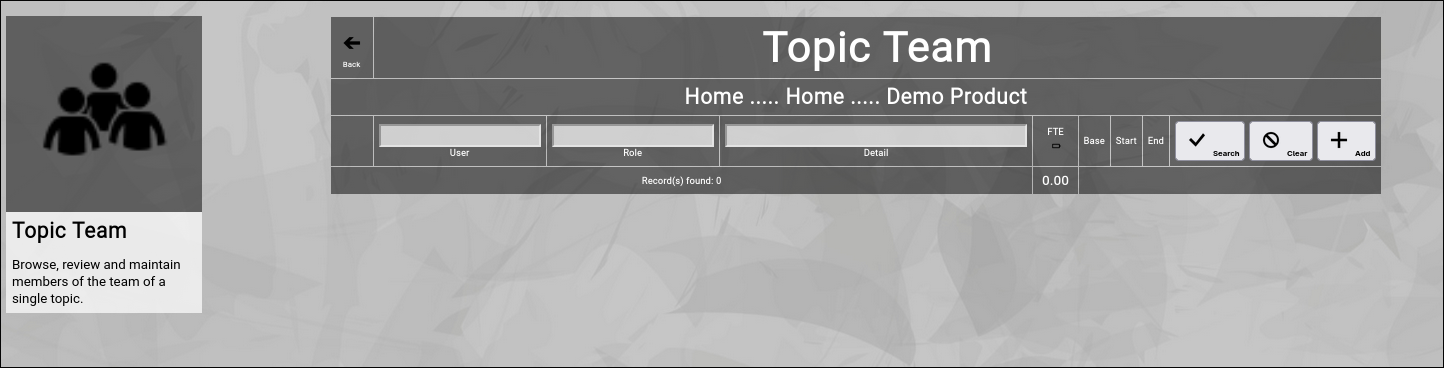
(Zingoolarity topic team screen)
You can now click the "Add” button to add a new team member to the topic.
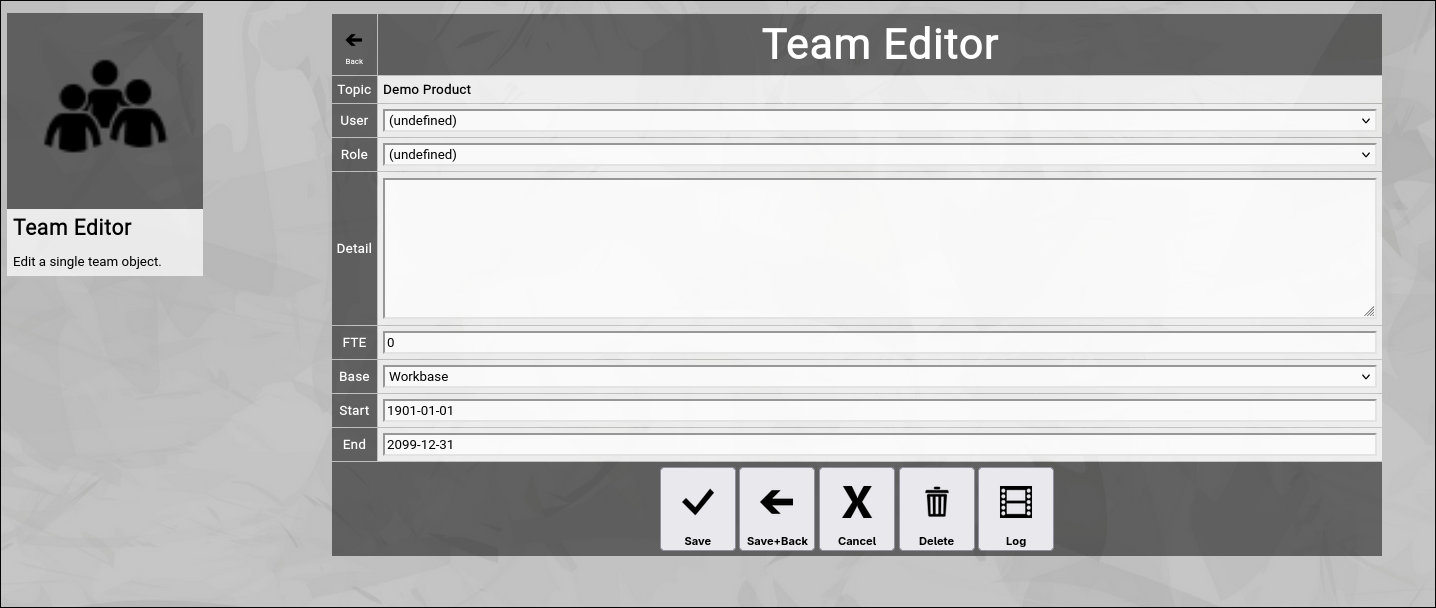
It will switch to the team editor screen:
(Zingoolarity topic team screen)
Let us have a quick look at the available fields:
- User
The "User” in a team represents a person selected from the listed users of the Zingoolarity instance.
It can be selected from an alphabetically sorted drop-down list.
- Role
The "Role” in a team represents the official role which the user takes over in the context of the team.
Roles come from a predefined list established in your Zingoolarity instance (See "Using the Roles Browser” chapter further down in this getting started guide for more details how to maintain this list).
It can be selected from an alphabetically sorted drop-down list.
- Detail
The "Detail” of a team member contains an optional textual description of the team membership (if needed).
Much like the "Detail” of a topic it can manually contain HTML tags (like the "
” tag in the example above to force a line break).
- FTE
The "FTE” (Full Time Equivalent) of a team member defines, how much of the available time the new team member will spend on the role in the context of the team.
The "1” is defined as "fulltime”, the "0.4” for example means "two days a week” and the "0.5” for example means "halftime”.
If your topic represents a unit in a line organization, this is the overall available workforce of the person; if your topic represents an item of the work organization (e.g. a product team), this is the part of the overall workforce which will be spent on the topic.
If your topic just represents a "responsibility” (for example Rose Tyler is making sure that the epic will be completed), you can leave the default of "0” (as it is not a fixed time assignment).
- Base
The "Base” of a team member can be either "Homebase” or "Workbase”.
The "Homebase” option designates that the assignment is a line organization (making resources available).
The "Workbase” option designates that the assignment is a work organization (consuming resources).
As a rule of thumb, you should use "Homebase” when assigning users to your company orgchart and should use "Workbase” when defining working structures (projects, products, etc).
- Start and End
The optional "Start” and "End” of a team member can limit the membership to a certain starting date (for example if the user is a new recruitment or is changing assignment by the end of the month) or to a certain ending date (if the user will switch to a different assignment or will leave the company).
Much like in the topic editor screen, you have a selection of buttons to complete your input:
- The "Save” button will just save your team membership (without leaving the team editor screen).
- The "Save+Back” button will do the same but return to the previous screen.
- The "Cancel” button will just return to the previous screen (without saving).
- The "Delete” button will request confirmation, will delete the team membership and then will return to the previous screen.
- The "Log” button will show a historical transaction log of the current team membership (for auditing purposes).
When you return to the previous screen, you will see the team membership which you just added in the list of the team:
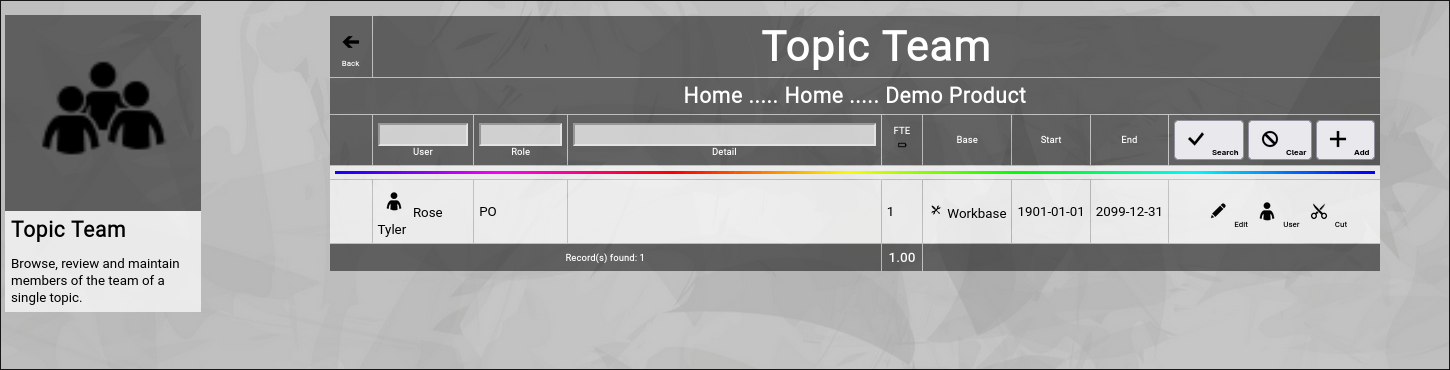
(Zingoolarity topic team screen with a recently added team member)
And you will also see the "rainbow bar” again, marking the team membership which you just edited.
This is helpful if there are already many team members for the given topic.
The screen will scroll to the last edited team membership and will highlight it with the "rainbow bar”.
Editing an existing Team Membership
You will also see the "Edit” button next to each and every user in the team.
Clicking this button will allow you to switch to the team editor screen again to make some modifications.
Viewing or Editing a User
Sometimes it may be necessary to view the user or make some changes in the user, which you added to the team.
You can click on the "User” button next to the team member to invoke the user editor screen for it.
Note that editing will only be possible if you are an administrator.
Cutting and Pasting Users between Teams
Sometimes it makes sense to move a bunch of users from one team to another team.
This can be accomplished by the use of the clipboard.
You may have noticed the "Cut” button next to a team member.
This function is only available if you have ".w” (write) level access to the topic.
If you click this button, the team membership record will be moved to your personal clipboard.
As soon as there is a team membership in your personal clipboard, the "Paste” button will show up in the team editor screen:
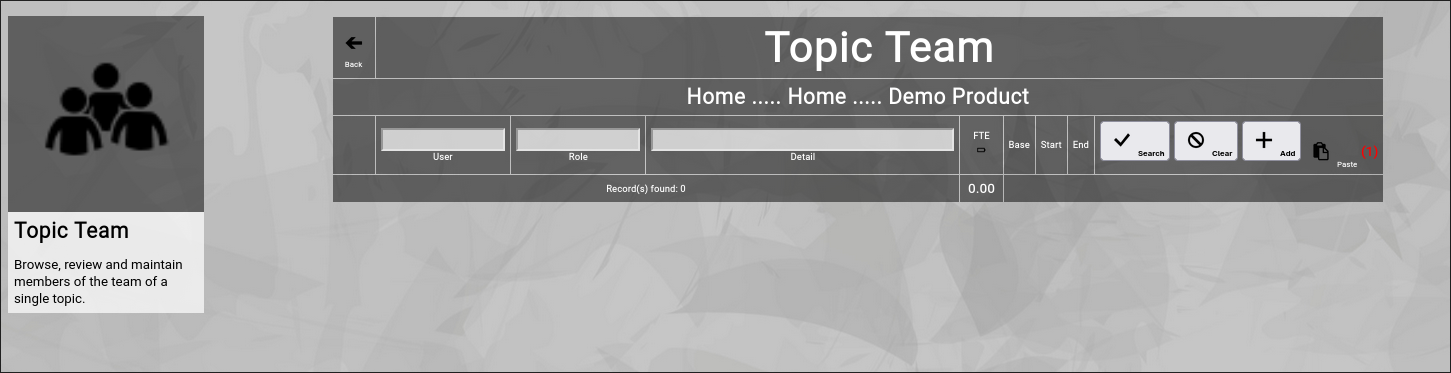
(Optional paste button in the Zingoolarity topic team screen)
In RED, it will also show the number of team memberships currently in your personal clipboard.
You may now navigate to the team editor screen of another topic and click the "Paste” button to paste the team memberships there.
Filtering the Topic Team
In general, the team members are sorted by the predefined order of their role and inside of their role in alphabetic order.
If you already have many team members added, it might be helpful to additionally filter.
You can enter:
- Part of a "Username”
to search for a given team member only.
- Part of a "Rolename”
to search for a certain role only.
- Part of a "Detail”
to search for a keyword in the details of the team membership.
You may click on the "Search” button to perform the filtering or click the "Clear” button to remove a currently active filter again.
Checking the Load of Team Members
If you are assembling a team for a project, a product or another more permanent role, it might be helpful to check the load of the team members.
To toggle this view, click on the small "Battery” button in the headline of the FTE column.
This will activate (or deactivate again) the individual resource assignment view of all the team members.
Here is an example:

(Zingoolarity topic team screen with activated load option)
Let us focus on the new table inside of the "Detail” column:

(Optional load option in the Zingoolarity topic team screen)
This lists all the assignments of a user (including the current one) and calculates a total load by separately adding up "Homebase” and "Workbase” assignments and finally comparing both numbers to each other.
In the current example, Rose has a work assignment and a line assignment with 1 FTE, so totals are calculated correctly and the result is "FullLoad" (can be "NoLoad”, "PartialLoad” or "FullLoad”).
Going Back to the Topic
You can click the "Back” button in the upper-left corner to return to the previous screen (in this case, the topic editor screen). |